Vitality 4 Life uses cookies to provide and improve our services, if you continue browsing, we consider that you accept its use. For more information, please see our privacy page.

7 Healthier Snack Recipes to Try with a Food Dehydrator
Make your own! Try these easy and (much) healthier snack recipes using a food dehydrator.
Snacks can easily be one of our biggest and unknown over-indulgences, with most snacks packed with hidden refined sugar, preservatives and colouring. Making your own snacks will not only save money but you can control exactly what goes into them, meaning the end result is much more wholesome and nourishing. Take a look at our dehydrator snack recipes below:
Click ahead to view the dehydrator snack recipes here...
Beetroot & Sweet Potato Chips
Kale Chips
Dried Fruit
Mixed Berry Fruit Rollup
Apricot & Coconut Fruit Rollup
Activated Muesli Bars
Gluten & Dairy Free Bread
Beef Jerky
Beetroot & Sweet Potato Chips
Dried not fried! Use your favourite vegetables to create healthy chips.
- 1 large sweet potato (yam)
- 3 whole beetroots
- 1 tbsp paprika
- 2 tbsp of oil (coconut or olive)
- Rock salt to season
1. Thinly slice sweet potato and beetroot, ideally into 3mm slices. The thicker the chips, the longer drying time they will require.
2. Place slices into mixing bowl and toss with oil and paprika.
3. Dehydrate at 55°C for 8 hours. Adjust drying time depending on thickness of vegetable slices
4. Season with sea salt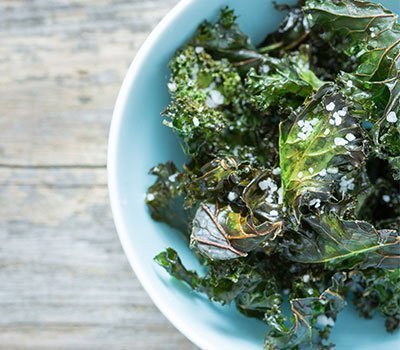
Salt & Vinegar Kale Chips
- 1 bunch of kale
- 1/2 cup of balsamic vingear
- 1 tbsp of oil (coconut or olive)
- Rock salt to season
1. Tear the kale leaves from the stalk and continue to tear into 10cm size pieces
2. In a large mixing bowl, coat the torn kale leaves with the balsamic vinegar & oil
3. Dehydrate at 45°C for 4 hours
4. Season with sea salt
Dried Fruit
Making your own dried fruit is not only so much healthier, but the flavour is far more intense, making them a naturally sweet yet healthy treat. Packaged dried fruit generally contains sulphur-dioxide, potentially dangerous for those with asthma or allergies. Ditch the preservatives and make your own!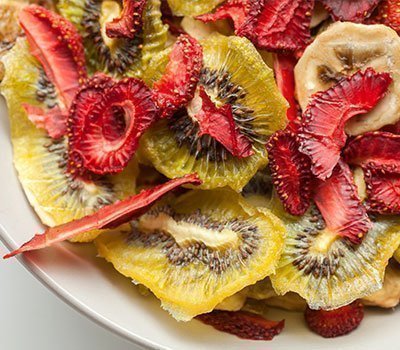
Our favourite dried fruits to try:
- Bananas
- Strawberries
- Apple & pear
- Kiwi fruit
- Mango
- Apricots or peaches
1. Thinly slice the fruits ideally into 3mm slices. The thicker the slices, the longer drying time they will require
2. Place fruit slices onto the dehydrator trays ensuring they are not overlapping. You can squeeze the fruit with lemon to prevent browning
3. Dehydrate at 55°C for 8 hours. Adjust drying time depending on thickness of fruit slices. Different fruits will require different drying times because of their water content, but as a general guide 8 hours should be sufficient
Mixed Berry & Apple Fruit Rollup
Blend/puree any of your favourite fruits to create delicious, chewy fruit leathers. Add yoghurt for creaminess.
- 2 cups of mixed berries (de-frosted frozen (strained) or fresh)
- 2 'granny smith' or 'pink lady' apples
1. Chop the apples into cubes for easy blending (omit seeds/core)
2. Blend the berries in a high speed blender until you have a smooth consistency
3. Prepare a dehydrator tray with a non-stick sheet or baking paper so that it covers the entire tray neatly
4. Pour the berry mixture out onto the sheet. Pour into the centre of the non-stick sheet and work with a spatula out into a circle. Ensure the edges are the thickest part, the remaining circle should be evenly spread
5. Dehydrate at 55°C for 6-8 hours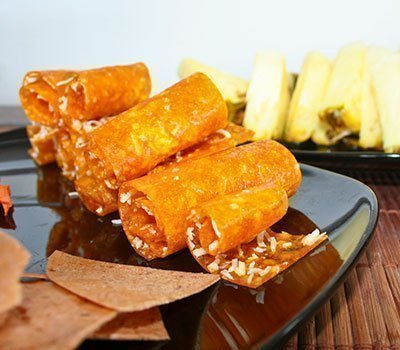
Apricot & Coconut Fruit Rollup
- 1 tin of apricots or 4 fresh apricots
- 50g of dried/desiccated coconut
1. Blend the apricots in a high speed blender until you have a smooth consistency
2. Prepare a dehydrator tray with a non-stick sheet or baking paper so that it covers the entire tray neatly
3. Pour the apricot mixture out onto the sheet. Pour into the centre of the non-stick sheet and work with a spatula out into a circle. Ensure the edges are the thickest part, the remaining circle should be evenly spread
4. Sprinkle the top with an additional 50g (or to your desire) of dried/desiccated coconut
5. Dehydrate at 55°C for 6-8 hours
For more Fruit Leather recipes, see our post 'Fruit Leather Recipes'.
Orange & Almond Activated Muesli Bars
Activated nuts are much easier for the body to digest and have increased nutritional value.
- 2 cups of rolled oats
- 1/2 raw almonds
- 1/4 cup of pepitas (or pumpkin seeds) or sunflower seeds
- 2 tbsp. salt
- 2/3 cup cold pressed orange juice
- 1/4 cup of shredded coconut
- 1 cup of chopped dried fruit (banana, dates, figs saltanas)
- 2 tbsp. honey or maple syrup
- 1 tsp. cinnamon
1. Add the salt to 1/2 litre of filtered water and add the almonds and pepitas. Cover and soak for 8+ hours
2. Roughly chop the almonds or blitz in a food processor for a finer consistency
3. Add the oats, juice and sweetener to mixing bowl and combine well
4. Add the almonds, pepitas, cinnamon, dried fruit, shredded coconut to oat mixture and combine well. Increase the amount of orange juice if consistency is too dry
5. Prepare a dehydrator tray with a non-stick sheet or baking paper so that it covers the entire tray neatly
6. Form mixture onto the non-stick sheet and spread until 1-2 2cm thick. Score the mixture so that it is easy to slice after dehydrating
5. Dehydrate at 55°C for 4 hours
Gluten & Dairy Free Bread or Crackers
Depending on the thickness of the mixture, this recipe can be used as a bread or cracker alternative.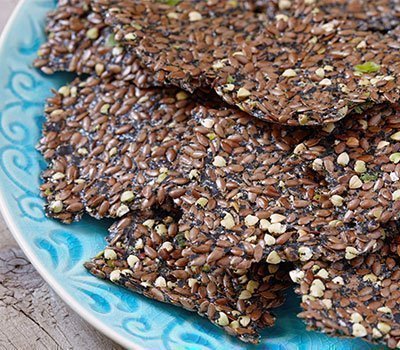
- 1 cup of buckwheat or quinoa, soaked for 5+ hours, rinsed and strained
- 1/2 cup of almonds, soaked for 5+ hours, rinsed and strained
- 1/2 cup of flax seeds, soaked for 5+ hours, rinsed and strained
- 1/4 cup of black sesame seeds or chia seeds
- Optional: 1 tsp ground fennel seeds
- 1 tbsp. molasses, honey, maple syrup or agave nectar
- 1 tsp. cracked black pepper
- 1/3 cup of water
- Juice of 1 lemon
- 1 tsp. sea salt
1. In a food processor or high speed blender, add the buckwheat/quinoa and almonds and pulse to chop
2. Add the water, lemon, salt, pepper, sweetener and fennel seeds and blend until smooth
3. Place into mixing bowl and add sesame seeds and flax seeds. Stir to combine
4. Prepare a dehydrator tray with a non-stick sheet or baking paper so that it covers the entire tray neatly
5. Spread the mixture onto the non-stick sheet. Thickness: 2cm for bread or 0.5mm for cracker. Score the mixture so that it is easy to break up once dried
5. Dehydrate at 55°C for 6-8 hours until the desired consistency is achieved
Beef Jerky
Making your own beef jerky is over 6 x cheaper than store-bought! Plus it is free from preservatives, MSG and sodium nitrate.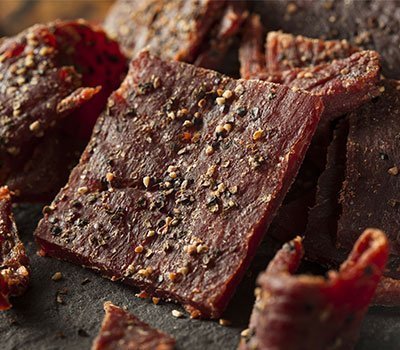
- 1 kg trimmed beef topside steak or rump steak
- 1/2 cup of soy sauce
- 3 cloves of fresh garlic crushed
- Optional: 1 tsp chilli flakes
- Sea salt flakes, for sprinkling before drying the meat
1. Make sure beef is trimmed of any excess fat
2. Slice beef into 5mm thick slices. For a chewy jerky cut strips along the grain, for a more tender jerky cut against the grain
3. Place sliced beef into bowl and add soy sauce, garlic and chilli. Mix together thoroughly. Allow to marinade for 4 hours if possible (it will marinade while dehydrating so is not overly necessary)
4. Place beef slices onto the dehydrator trays ensuring they are not overlapping. You may want to place a drip tray or baking paper on the bottom of the dehydrator (or on last unused tray) to prevent any dripping
5. Dehydrate at 65°C for 6-8 hours
For more Beef Jerky recipes, see our post 'Best Beef Jerky Recipes'.
[product id="1136"]
[product id="1266"]
[product id="1379"]
[product id="1375"]


