Vitality 4 Life uses cookies to provide and improve our services, if you continue browsing, we consider that you accept its use. For more information, please see our privacy page.

How to Compost: Helpful Tips on Turning Your Waste into Brown Gold
Keen to start composting? Have you tried before and did not create that beautiful ‘brown gold’ compost soil that you’ve heard about?
Don’t give up now! With a few tips, you can easily turn your kitchen and garden waste into good quality, organic compost to feed your garden.
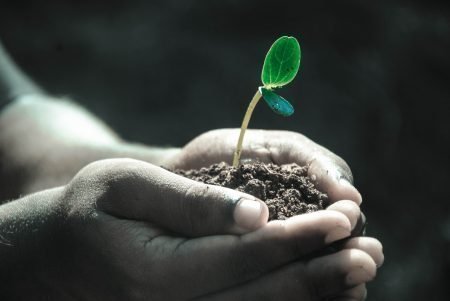 For the transformation of waste to compost soil to occur the right conditions need to be in place. You will need the right balance of oxygen, temperature, moisture, organic matter, and the right type and number of microorganisms.
The organic matter portion of the formula will need to be made up of the right levels of nitrogen and carbon to achieve optimum results. The levels of each will depend on your climate, composter location and the type of organic waste that you are adding.
But don’t be disillusioned. While it sounds like you need a science degree to make composting work, you can rest assured that you don’t. We are here to help you become the envy of your family, friends and neighbours with the best garden on the street!
Balancing Nitrogen & Carbon Waste
First things first; most waste produced from home users contains higher percentages of nitrogen from kitchen waste such as vegetables, fruits, leftovers, meats, coffee grounds etc. This therefore needs to be balanced in the compost with carbon waste from such things as straw, sawdust, leaves or shredded paper (just ensure the paper is not heavily printed).
If carbon based waste is not something that is included as part of your normal compost, adding some carbon material should be done each time you add compost. A good guide is a ratio of 10% carbon to the amount of compost you are adding from kitchen waste - this ensures an ideal balance of the two.
Tip: A covered bin of sawdust or equivalent carbon can be placed next to the composter for ease of use.
I’m New to Composting, Where Do I Start?
 Once you have positioned and set up your new composter there are a few simple steps to ensure your compost has the best start possible.
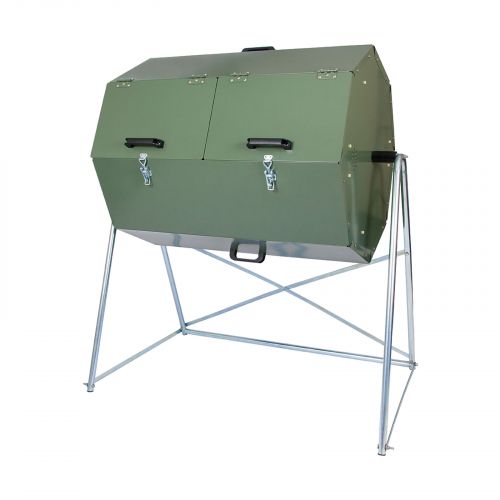
When using your Joraform composter for the first time, simply follow the below points to begin. Please note these steps may vary for different models and compost systems.
1. Add ready-made “active” compost to the empty chamber as your starter
2. Ensure your air vents are partially open on the chamber
3. Add in your daily kitchen waste
4. Add in some form of carbon matter such as sawdust, straw or wood pellets
5. Rotate well - using the handles for easy rotation
For further details on each step and general tips for the creation of compost with the Joraform composter, click here.
Tip: A bag of ‘active’ compost can be purchased from your local nursery for just a few dollars.
What Can I Compost?
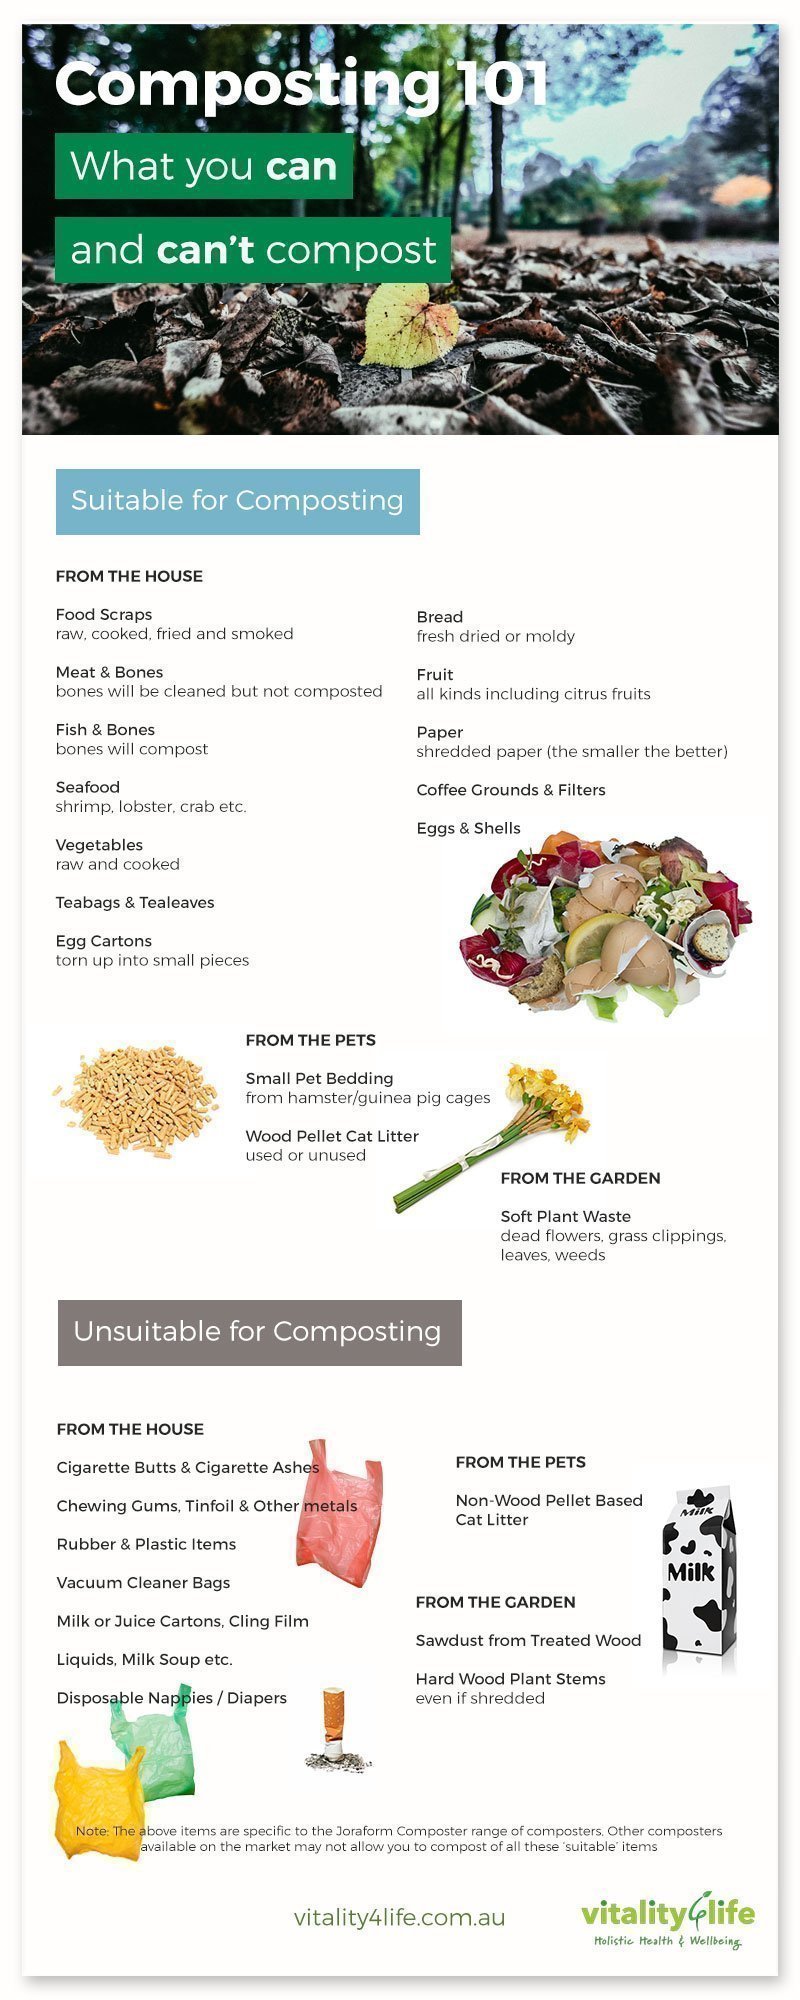
It’s amazing how many items can be turned into nourishing, rich compost for your garden with a Joraform Composter. We outline the do’s and don’ts when it comes to which home & garden waste items are suitable, and those that aren’t, in the graphic, below.
What Is the Best Time of Year to Start Composting?
 You can begin composting any time of the year however you should keep in mind that you will want enough heat production to rise the temperature in the bin and therefore ‘activate’ the composting process.
In some climates, a composter can become dormant during winter as the required level of heat is not being produced. So, depending on which composter you are using, winter may not be the best month to get started.
In very cold climates you may want to consider using a fully sealed, insulated composter to allow for regulation of temperature to ensure a consistent heat is maintained.
We recommend the Joraform range of composters for this reason as they offer insulation along with a galvanized steel construction and are all fully sealed – providing a steady temperature in both hot and cold climates, thus allowing you to compost year-round. This year-round composting can be very difficult to achieve with a plastic bin or open compost pile.
Reasons Why Your Composter Might not be Producing Compost Soil
The table below lists the most common conditions along with solutions for reversing and maintaining correct levels of carbon and nitrogen.
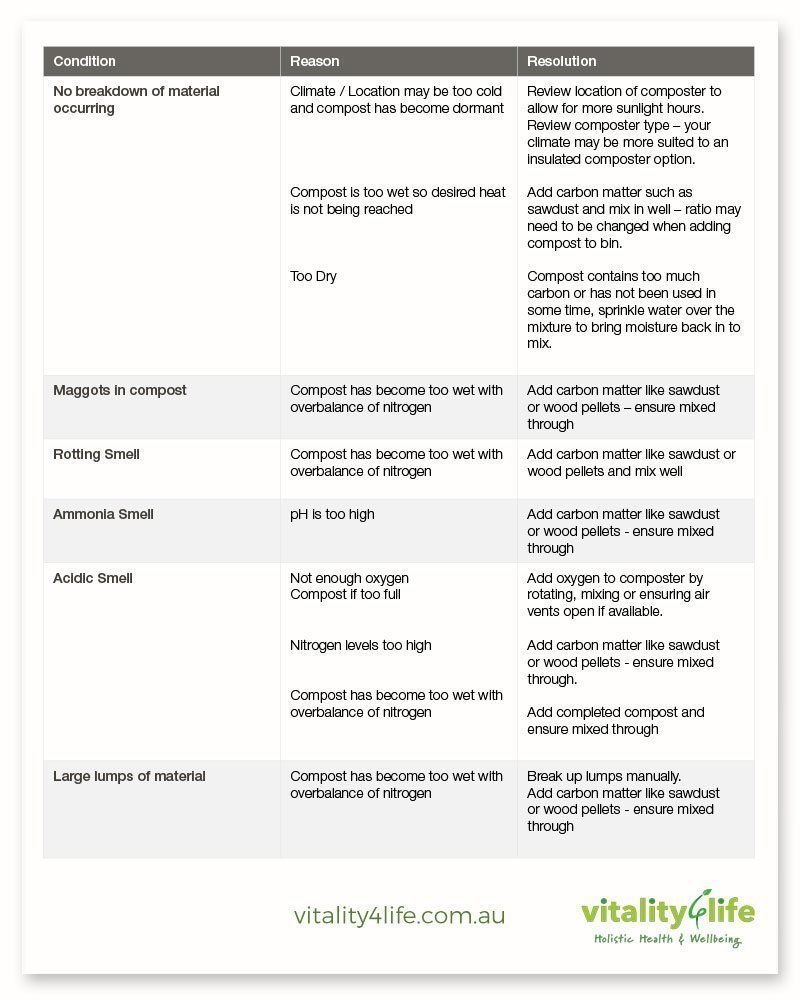
Monitoring the compost to ensure all is going well is vital. If you are unable to maintain the right levels due to location or climate you may want to review the type of composter being used.
How to Get the Best Results
 To get the best out of your composter and to make rich, nourishing compost for your garden simply follow the below four tips;
1. Rotating Composters - Use of a rotating compost tumbler provides easy mixing, faster breakdown time, minimal mess and easy removal of your compost soil once ready.
2. Sealed & Elevated - Composters that are sealed and elevated allow for composting of a greater range of ingredients without the concern of rodents and animals.
3. Insulation - Compost models with insulation will be far more effective at temperature control in all climates, seasons and locations
4. Air Vents - The inclusion of in-built adjustable air vents allows you to easily control the levels of oxygen.
What Happens When My Compost Bin Is Full?
Once your composter tumbler is full you will need to allow the compost to finish its composting process. This is completed by not adding any further waste matter, but ensuring you continue to mix or rotate the compost. Once the process is complete you will notice the texture of your compost is friable, soil-like and no longer contains portions of waste matter. Your compost soil is now garden ready!
Tip: For continuous composting a second bin would be required, or ideally a composter with dual chambers like the Joraform Composter tumblers.
How Do I Best Use Finished Compost?
 Your finished compost is extremely nourishing for your plants and garden. A good guide of how much to use is 5 litres per square metre in your open garden or veggie patch, and 1 litre of compost to every 5 litres of standard soil for your pots and indoor plants.
The finished compost can be added directly to your existing soil around your garden plants as a mulch or dug into soil to prepare beds for planting. For use in pots you can make your own potting mix using the compost and necessary additions dependent on the variety of your plants.
You can also use finished compost to make ‘compost tea’, which can be used as a spray directly on the plants or added to your watering process to help prevent diseases whilst providing your plants with an alternate source of nutrients.
Tip: “Compost Tea” can be made by steeping aged compost in water for 3 to 4 days and stirring even so often. After the fourth day, simply strain the mixture through cheesecloth or another porous fabric into bucket. Add the leftover solids to your garden or back into your compost bin. Dilute the remaining liquid with water so that it’s the colour of weak tea then use immediately on your plants for optimal absorption into the soil.
Ready to start composting but not sure which composter is best for you? No problem, check out our blog post ‘Which Composter Is Best For Me?’ and get all the answers you need to start composting today!


